Automating a TradingView Death and Golden Cross Strategy
With this tutorial, you will learn how to trade with Death and Golden Crosses using two Exponential Moving Averages (or EMA).
The concept is to:
- Buy when the short term EMA crosses up the long term EMA. This is a Golden Cross and is usually a bullish sign.
- Sell when the short term EMA crosses down the long term EMA. This is a Death Cross and is usually a bearish sign.
1. Automatically identifying Death and Golden Crosses
1.1 Select your traded market
First, we want to visually see our Death and Golden Crosses. Let’s go to TradingView and select the trading pair, exchange and time frame we want to trade.
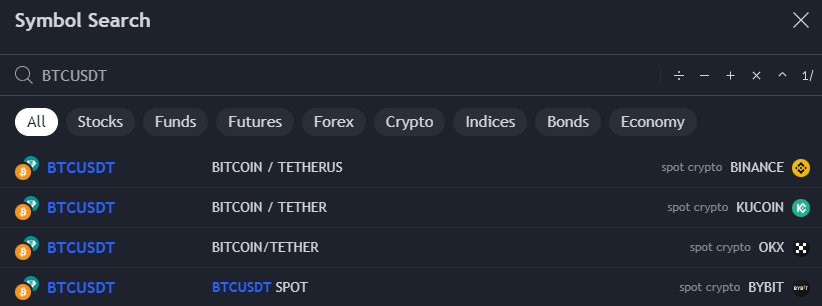
For this tutorial, we will trade BTC/USDT on Binance using the 5 minutes time frame. Of course, any other value would also work.
Note: Trading on Death and Golden Crosses is usually more profitable on longer time frames. In this tutorial the 5 minutes time frame is only meant as an example.
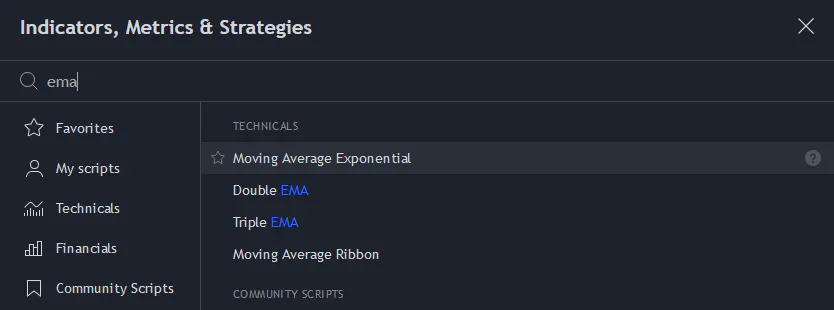
1.2 Add the EMA indicators
Then we will add the Exponential Moving Average indicator twice:
- Once for the long term EMA
- Once for the short term EMA
1.3 Configure the EMA indicators
Click on the Settings of both of your EMA indicators and set the Length value according to how you wish to configure your Death and Golden Crosses.
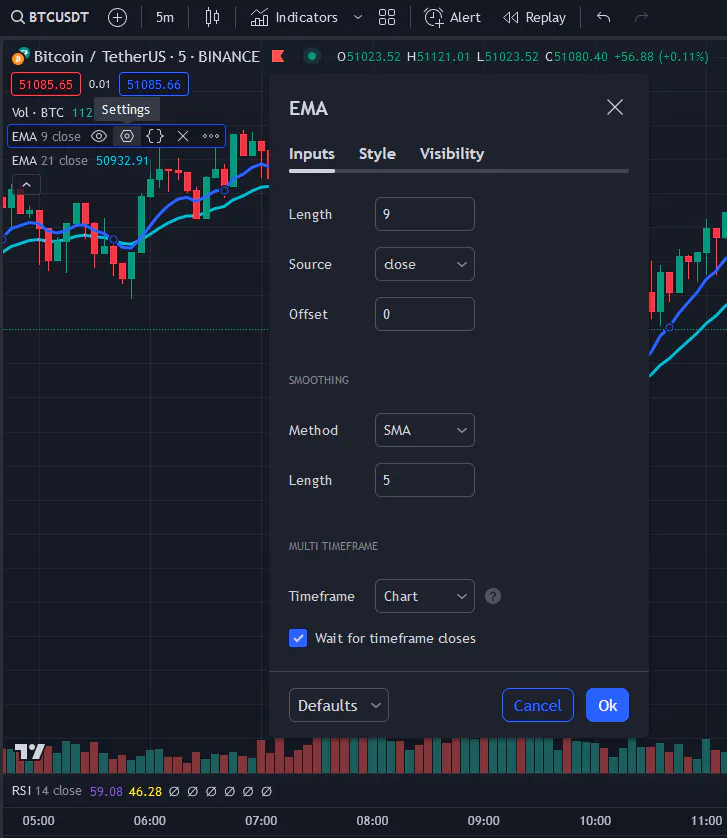
In this example, we will use the following values:
21for the Length of the long term EMA9for the Length of the short term EMA
Note: you can also configure the Style of those EMA to make them easier to visualize on the chart
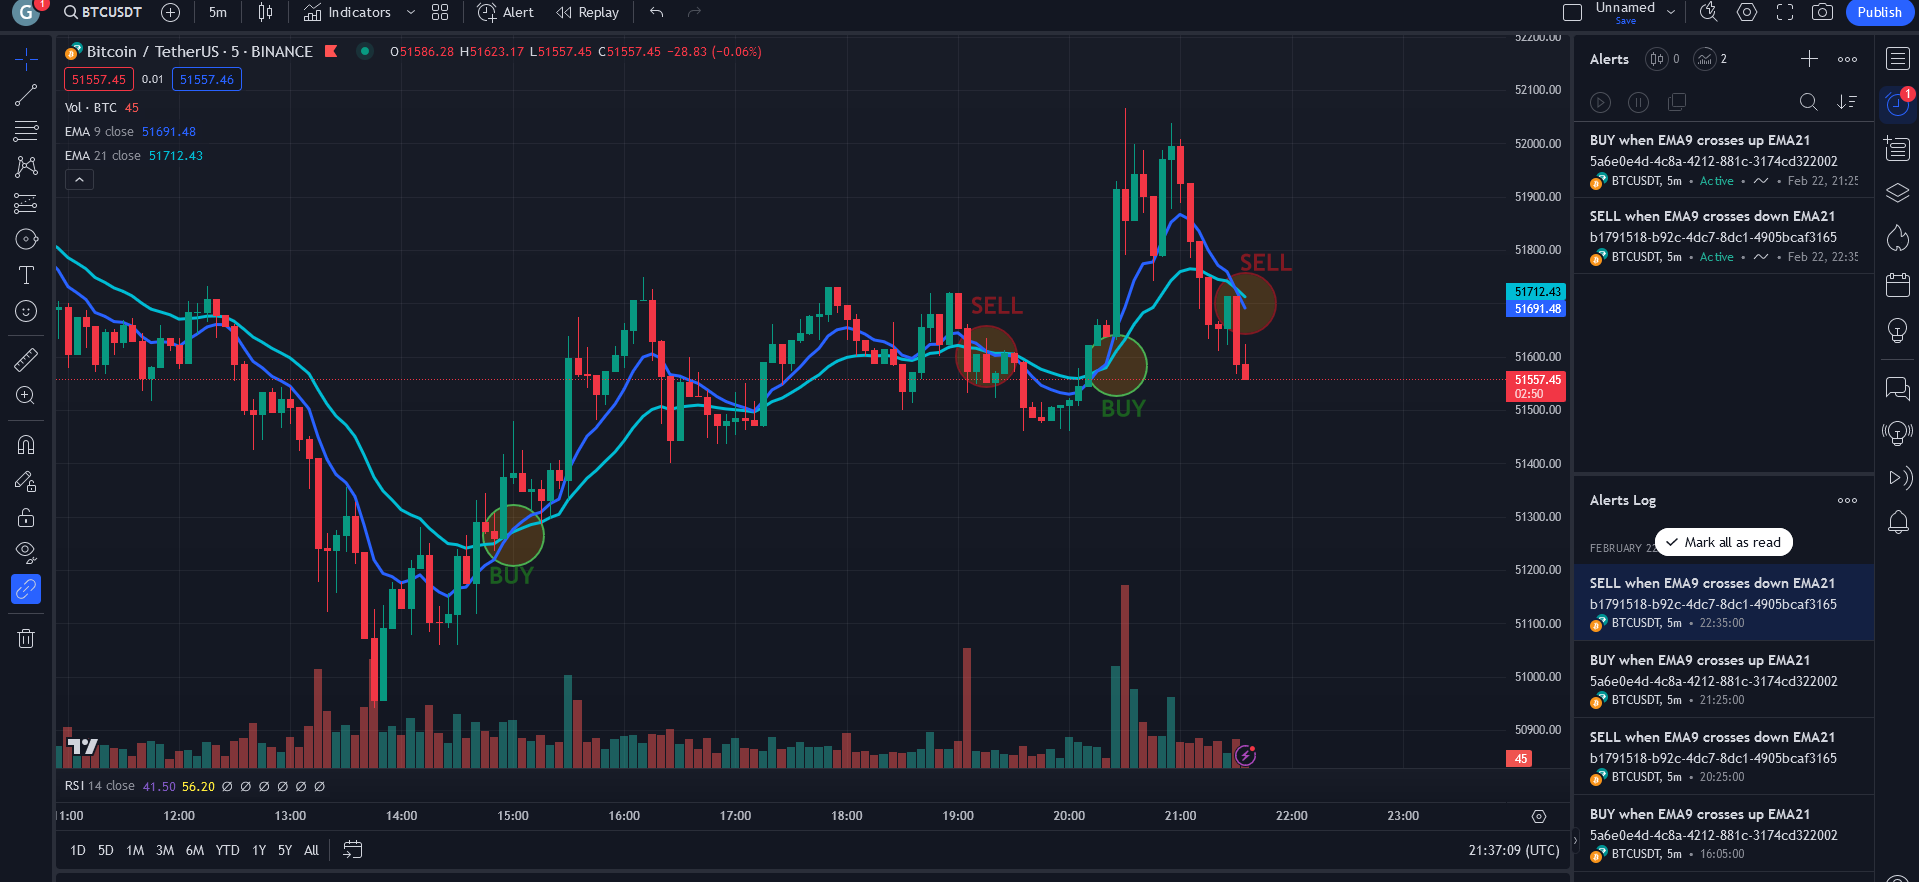
1.4 Visualize the Strategy
Death and Golden crosses happen when the long and short term EMA are crossing. We can now easily see what it would look like.
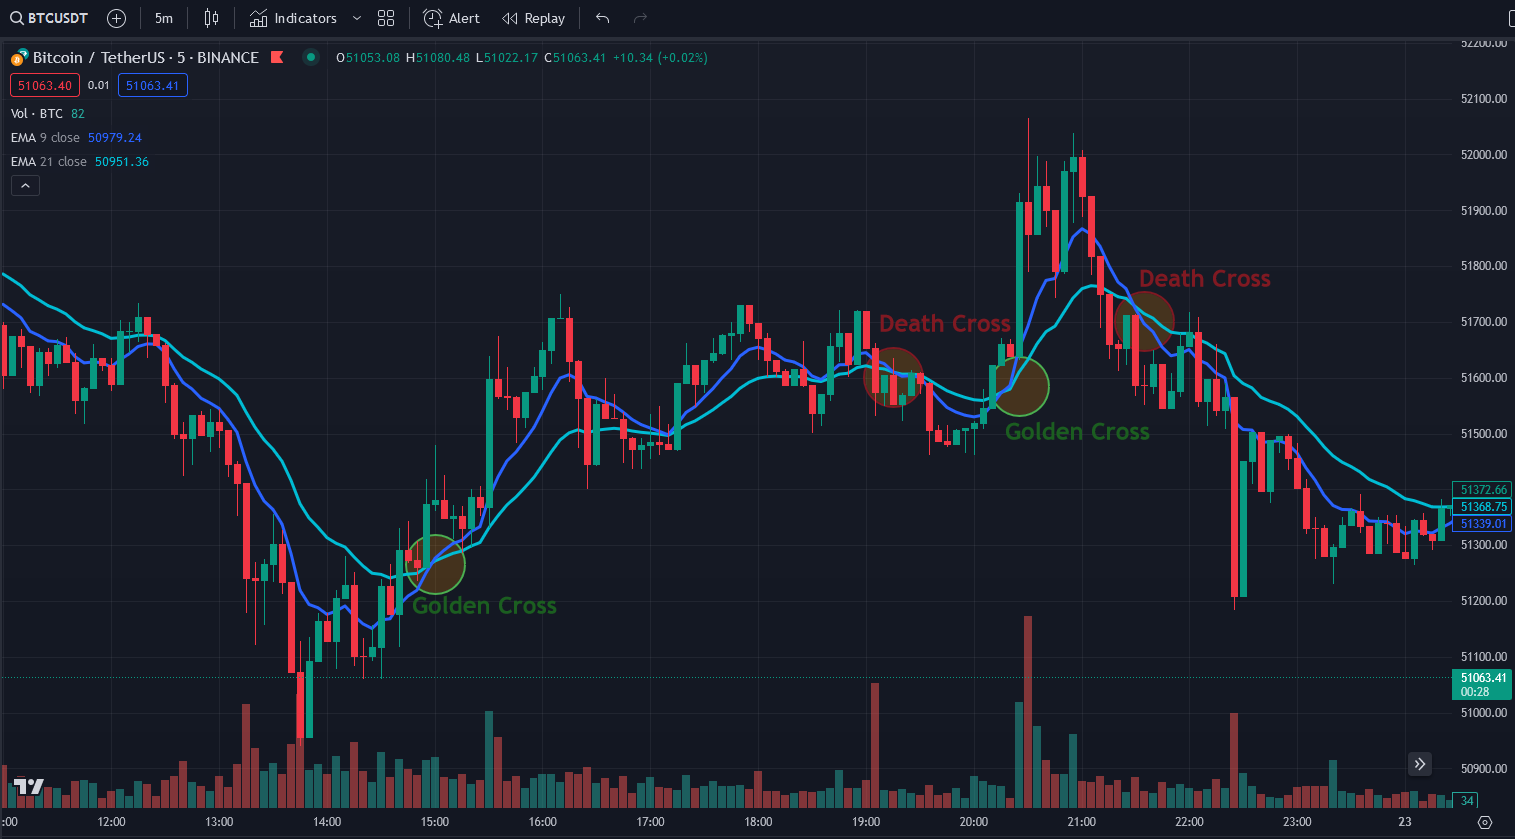
Our strategy is ready, the only remaining step is to create an OctoBot to trade when those crosses happen.
2. Creating OctoBot automations to buy and sell
2.1 Create a TradingView OctoBot
Let’s open a new tab and go to OctoBot cloud to start a new TradingView OctoBot

For this tutorial, we will start a bot on Binance. If you are unsure about how to start a TradingView OctoBot, check out the Create your TradingView OctoBot section of the TradingView trading tutorial.
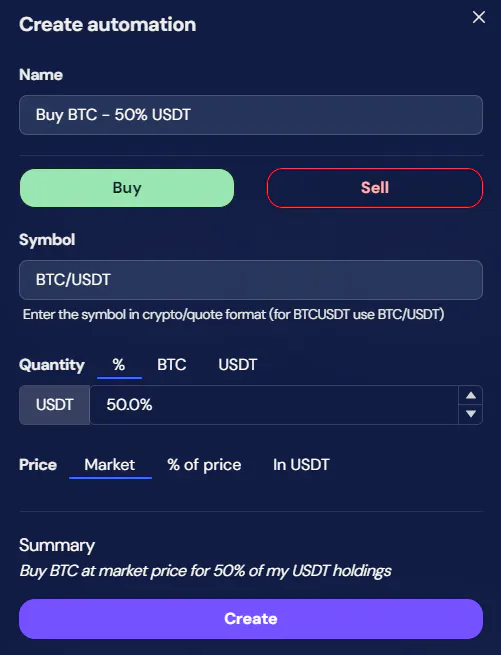
2.2 Create your BUY automation
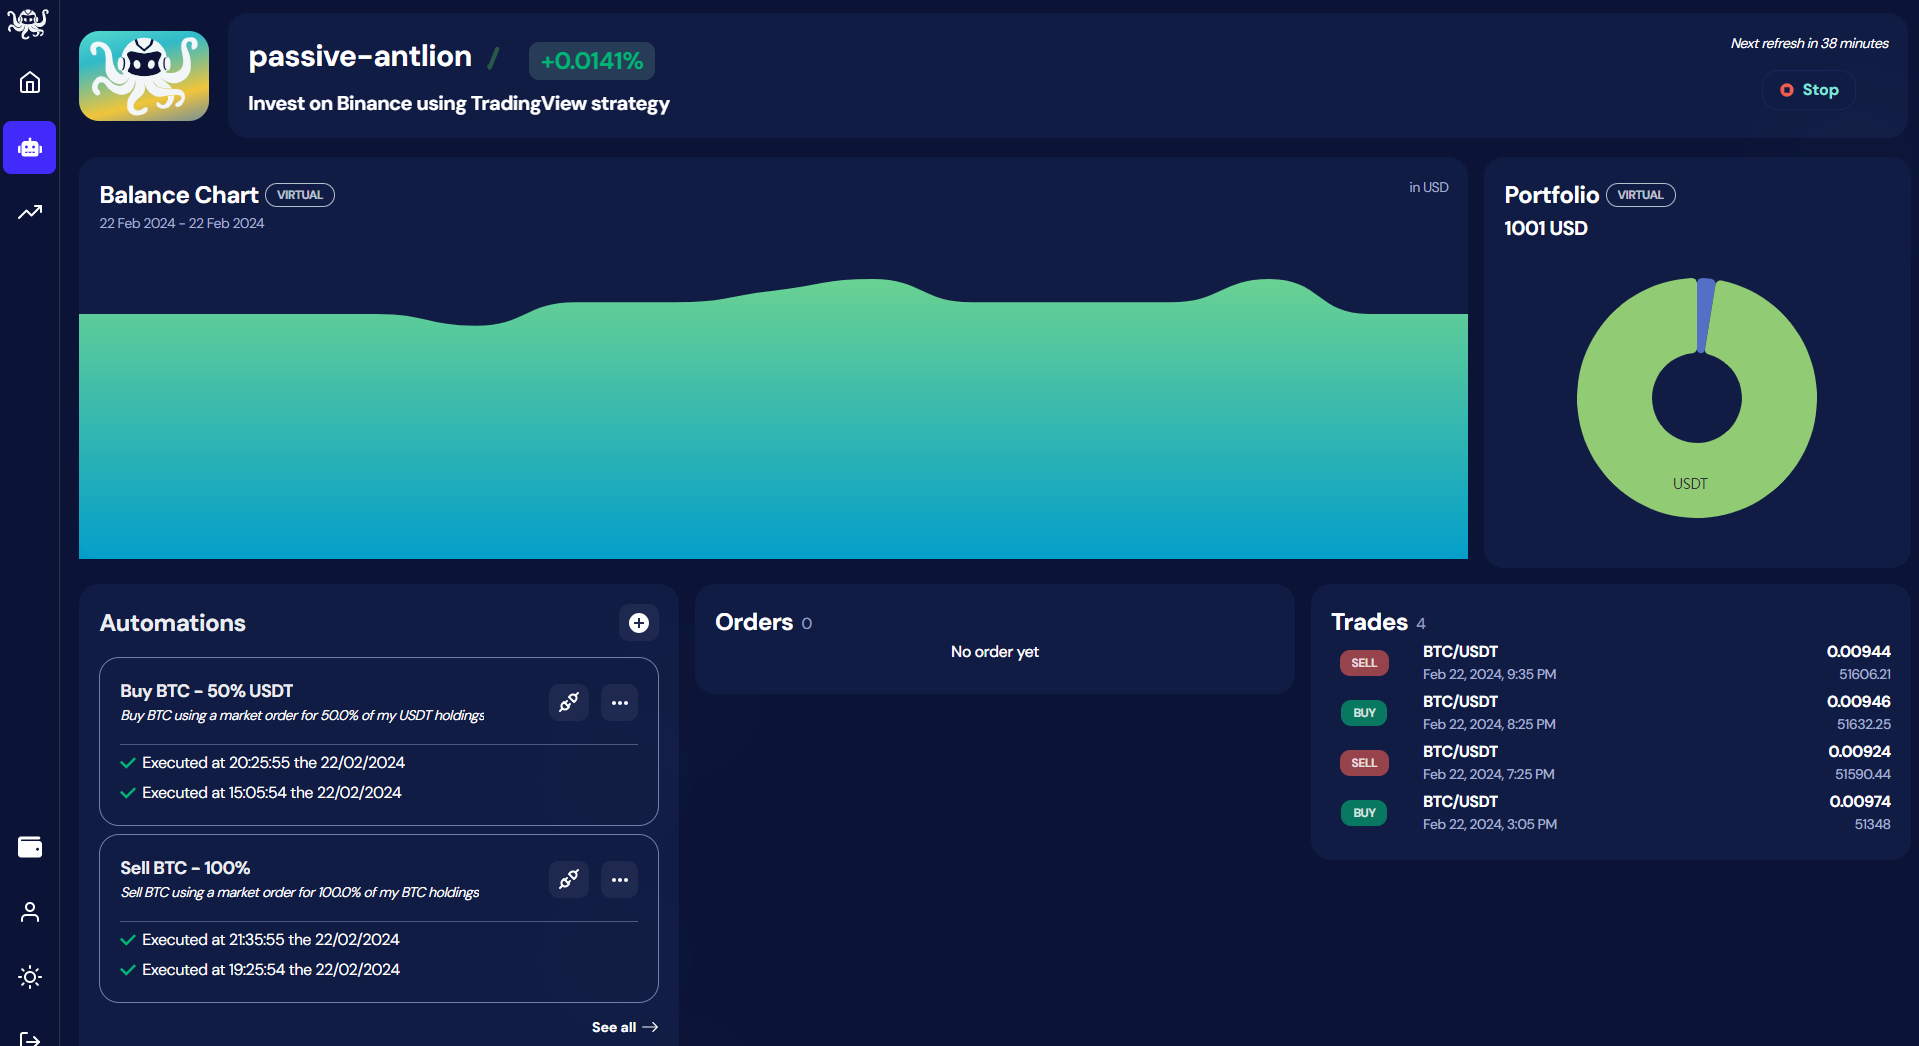
When a Golden Cross happens, we want our OctoBot to buy. For this tutorial, we will buy using 50% of our portfolio’s USDT holdings.
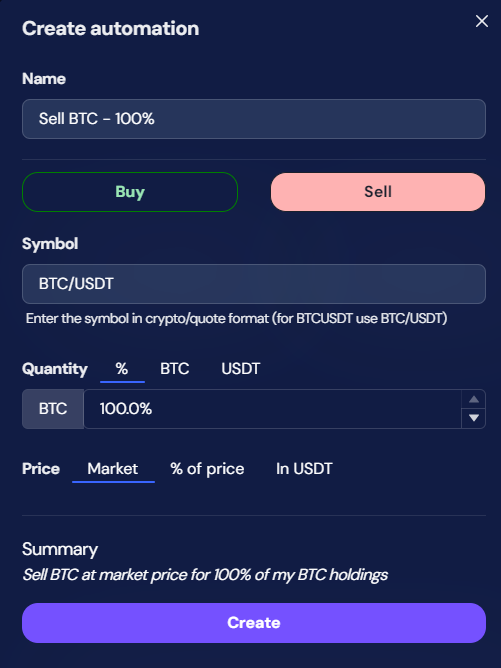
2.3 Create your SELL automation
When a Death Cross occurs, we want our OctoBot to sell. For this tutorial, we will sell all of our portfolio’s BTC holdings.
Note: in this tutorial, we are keeping things simple by using market orders, selling everything at once and having only one type of BUY and SELL automation.
Since there is no limit the the automations you can create, you customize this strategy as much as you want by creating other BUY and SELL automations.
3. Binding automations to trigger on Crosses
Note: the following steps are assuming that you already configured your TradingView Alerts webhook URL. If it is not the case, please follow the Configure the webhook URL guide.
3.1 Buying on Golden Crosses
Open the connection panel of your BUY automation and copy its automation identifier.

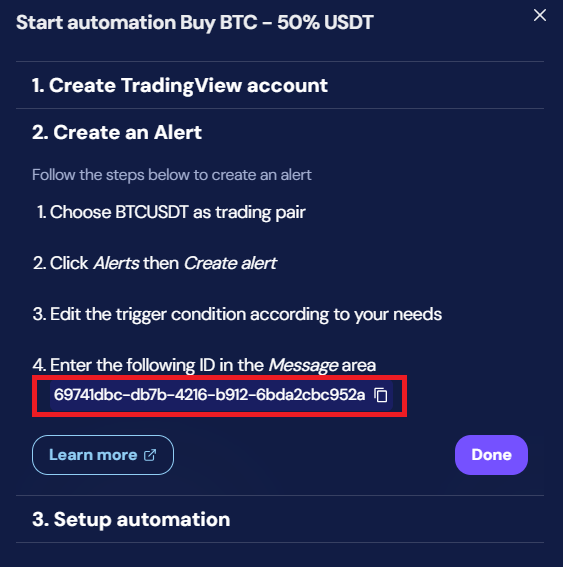
Going back to your TradingView tab, create a new alert
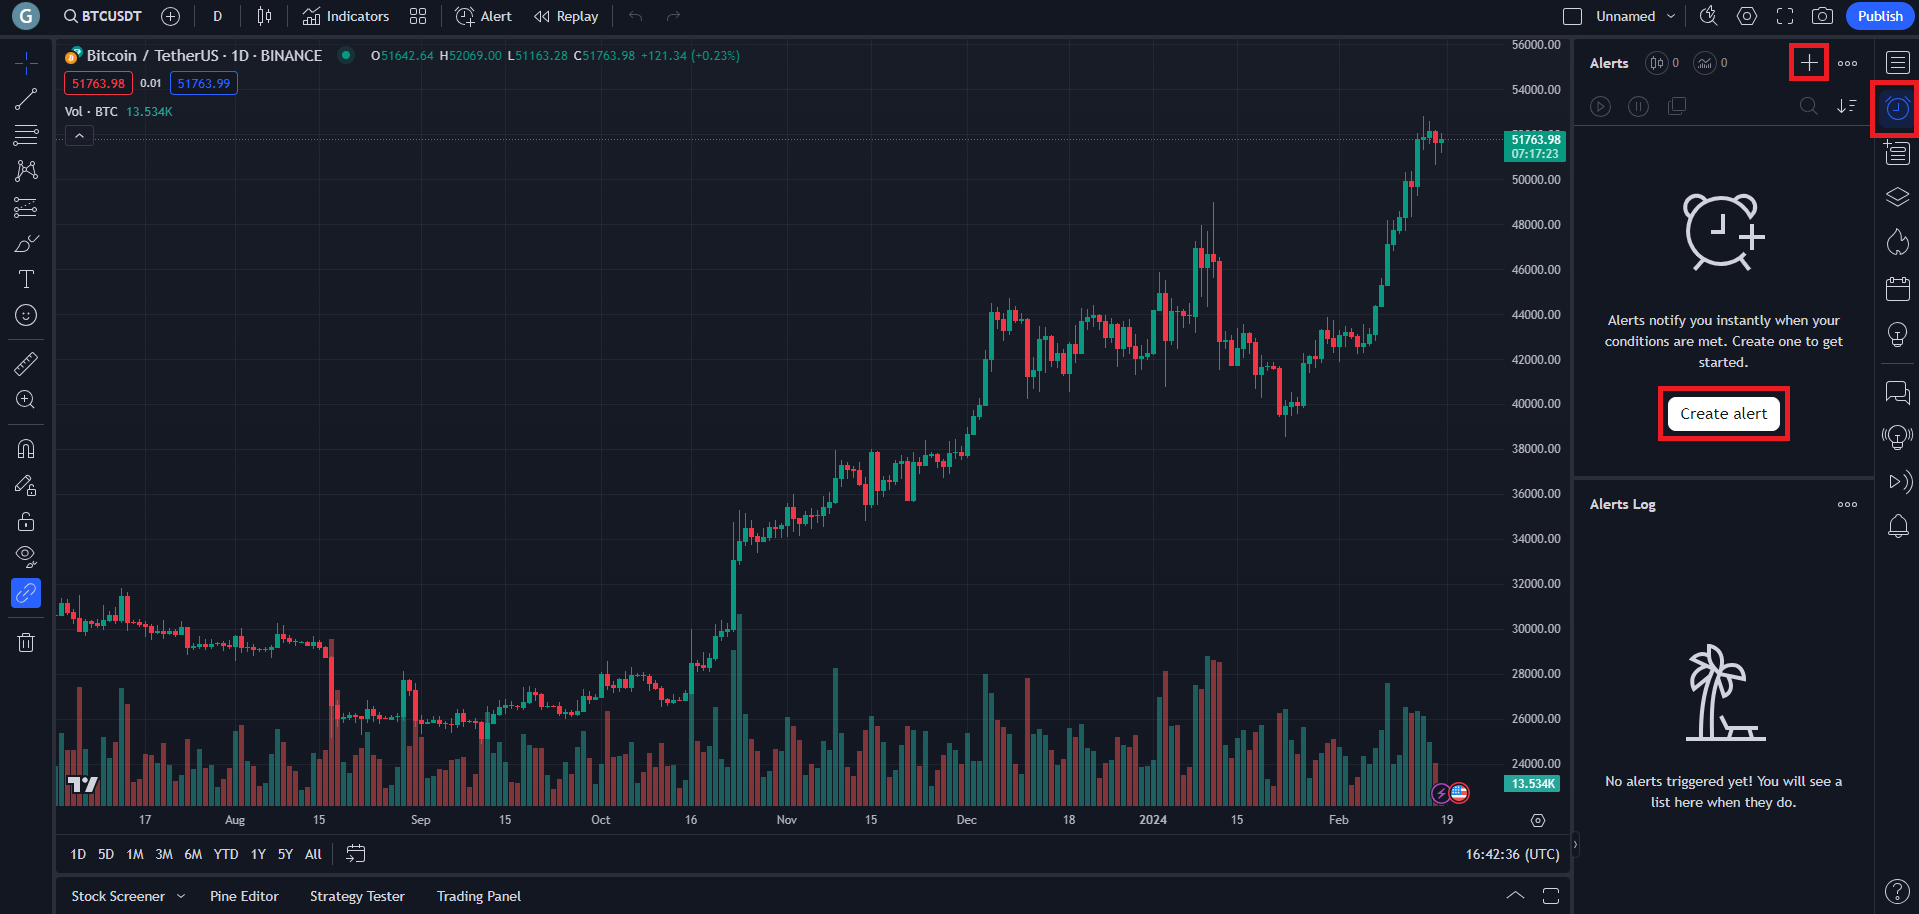
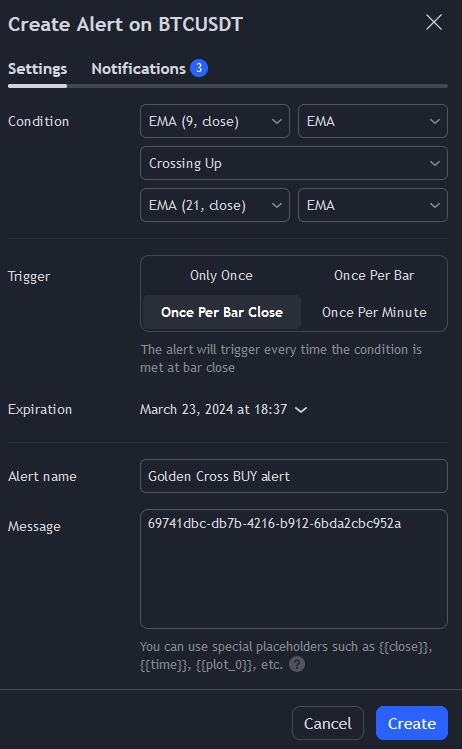
In this alert, pay attention to:
- Select
Crossing Upas wall as EMA 9 and 21 as Condition: this is our Golden Cross. - Select
Once Per Bar Closeas Trigger to check for Golden Crosses on each candle close. - Give a meaningful name to your alert to easily identify it later on.
- Replace the full Message value by your BUY automation identifier from the OctoBot tab.
Great ! Your TradingView strategy will not send an alert triggering your OctoBot BUY automation when a Golden Cross is identified according to your EMA settings.
3.2 Selling on Death Crosses
Similarly to the Golden Cross configuration:
- On your OctoBot tab, open your SELL automation connection panel.
- On the TradingView tab, create a seconds alert to identify Death Crosses and configure it to trigger your SELL automation.
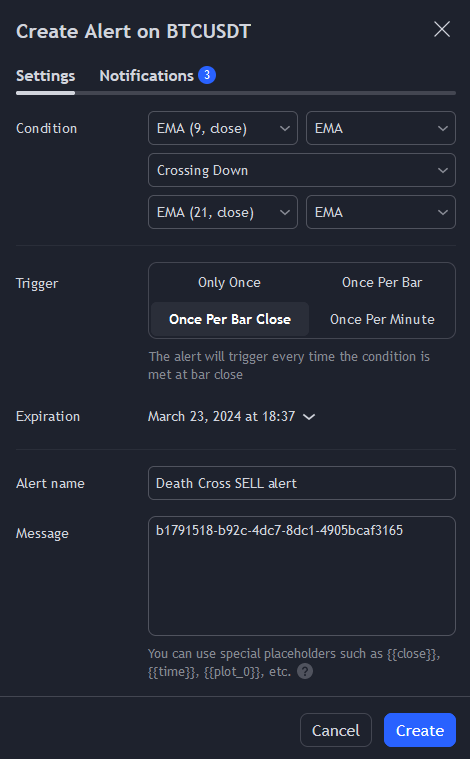
In this alert, remember to:
- Select
Crossing Downas wall as EMA 9 and 21 as Condition: this is our Death Cross. - Select
Once Per Bar Closeas Trigger to check for Death Crosses on each candle close. - Give a meaningful name to your alert to easily identify it later on.
- Replace the full Message value by your SELL automation identifier from the OctoBot tab.
The strategy is ready
And that’s it ! We just created an EMA Death and Golden Cross strategy on TradingView and automated its trading using OctoBot. Everytime a Death or Golden cross happen on TradingView, our OctoBot will buy or sell BTC accordingly.
Of course, you can use this configuration to trade any pair(s) on any exchange using your real funds or risk free with simulated funds.
We hope this tutorial was clear enough. Please let is know if there is something we should improve.
Warning: The strategy presented in this tutorial is only meant for educational purposes and is not financial advice.